When
you make an animation many default settings are used to
guess at the result that you want. Commonly you will
not be satisfied with these settings and will want to change
them. You can assess these setting through the Options
menu:

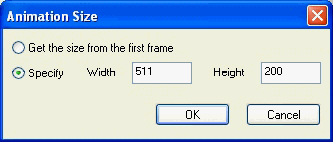
Animation
size
Every image inside an animation must be the same
size for the animation to be built successfully.
You have a choice of using the image in the first frame
as the trend setter or you can set the width and height
directly.

If
an image is not the correct size Antechinus Animator Professional
will prompt you for a solution.

You can:
- skip
the image,
- resize
it
- centre
the image
- trims
it evenly from all sides (common for photos) if too
big
- leaves
a border around the outside if too small. The
color is selected by clicking on the color bar.
- crop
it (if it is too big) and test where you want the image
to start.
- (x=
-10) will remove 10 pixels from the left hand side.
- (y
= -20) will remove the top ten pixels.
If
you want to use the same solution for all out of size images
you can click the check box on the bottom left of the dialog
box, otherwise you will be asked to solve the problem for
every image that is oddly sized.